Connecting to the MC-III Interface Software for MC-III Flow Analyzer Display
MC-III Interface Software
 |
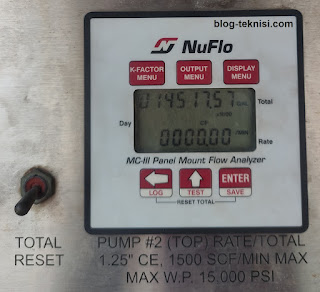
| Figure 1.1 - MC-III Panel Mount |
The MC-III Interface software provides easy access to all configuration parameters and is the quickest way to configure the device. Instead of navigating keypad menus, users can enter configuration parameters with the computer keyboard.
 |
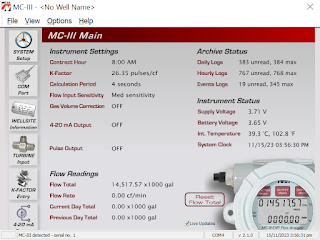
| Figure 1.2 - MC-III Main (Blog.Teknisi) |
1). Installing the Software
→Click on "Next" to initiate the installation, and follow the instructions on the screen. An MC-III icon will appear on the desktop of the user's PC or laptop when installation is complete. FREE download here.
→To access the interface software, click on the MC-III icon on your desktop or go the Start menu and select
Programs>NuFlo>MC-III>MC-III.
 |
| Figure 1.3 - MC-III Interface Software |
2). Connecting to the Software
→Select a communications port from the dropdown list and click OK.
 |
| Figure 1.4 - Select COM Port... |
→The software will attempt to connect with the MC-III (via an RS-485 to RS-232 converter). This automatic launch feature is referred
to as an Express Connect.
 |
| Figure 1.5 - COM4 Serial Port (OK) |
3). Automating Functions on Software Startup
→When the software connects with the instrument, the Device Autorun Options screen appears.
From this screen, users can configure the instrument, download logs, or upload previously saved configuration
settings.
 |
| Figure 1.6 - Device Autorun Options |
 |
| Figure 1.7 - MC-III Main Screen |
#MC-III Main Screen
The MC-III Main menu screen (Figure 1.7) is the configuration hub of the MC-III. From the Main
screen, users can;
• Review all current instrument settings and flow readings
• Check the log archive and instrument status
• Access all submenus for changing configurable parameters
• Reset the total to zero
Data Display and Updates
→Each time the software polls the instrument, a small icon appears briefly in the lower left corner of the screen.
If the Live Updates checkbox in the lower right corner of the screen is checked, the instrument settings and
the LCD displays will automatically update with each poll.
Reset Flow Total Button
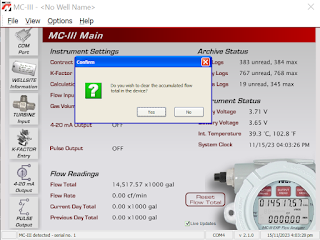
→The flow total can be reset to zero at any time by clicking on the Reset Flow Total button.
 |
| Figure 1.8 - Reset Flow Total |
 |
| Figure 1.9 - Zero Flow Total |
FREE download the User Manual:
Are you a software developer looking to get your product out into the world and make a splash in the market?
ReplyDelete