Caterpillar ET Software
The Communications tab in the Preferences dialog box allows the communication
interface device and the ports necessary to run the service tool to be set. NOTE: The information in the Communications tab is
dependent upon the Communication Interface Device selected.
#To set the Communication Preferences:
1). Open Caterpillar ET Software, it will automatically connect to the ECM.
2). Click Stop Connect.
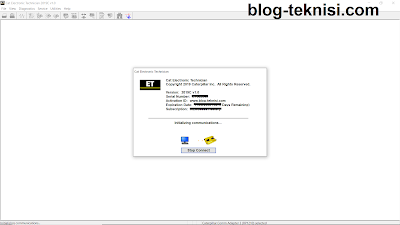 |
| Figure 1.1 - Initializing Communications... |
3). Select Utilities - Preferences - Modify...
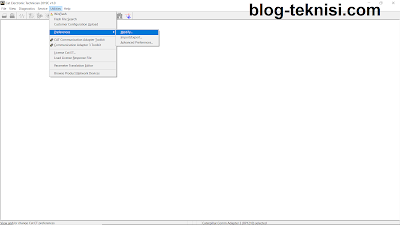 |
| Figure 1.2 - Preferences (Modify...) |
#If using Caterpillar Comm Adapter III, select
J1939 Baud Rate.
→The J1939 data link speed may support values of "250K", "500K" and "Auto".
The selected value must match the product being serviced.
 |
| Figure 1.3 - Caterpillar Comm Adapter 3 (RP1210) |
NOTE: If the Enable Dual Data Link Service checkbox is selected, two ECMS using two different data links may be serviced simultaneously without switching the data link connection. When applicable, this checkbox is selected by default.
#If using Caterpillar Comm Adapter II, setting
Ports (for example: COM1) as your COM port at Device Manager.
 |
| Figure 1.4 - Caterpillar Comm Adapter II (RP1210) |
#If using NEXIQ USB-Link, select RP1210 Compliant Device, and select Advanced... button to select a specific RP1210/ USB-Link (1) - NEXIQ Technologies USB-Link.
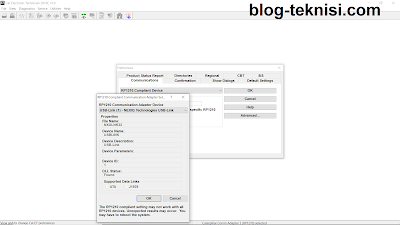 |
| Figure 1.5 - USB-Link (1) |
→Select another
Communication Adapter and
RP1210 Compliant Devices.
 |
| Figure 1.6 - RP1210 Communication Adapter Device |
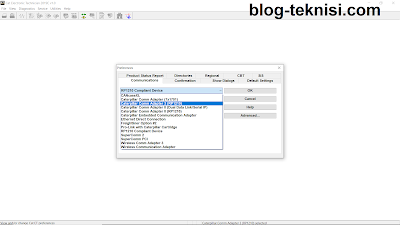 |
Figure 1.7 - Communication Adapter
|
#Driver Download:
→When a data link is established, the service tool returns to the main menu and
displays the ECM Summary screen.
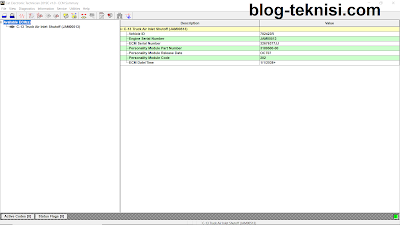 |
| Figure 1.8 - ECM Summary |
→When a data link connection is not established, the service tool provides
information for correcting the problem.
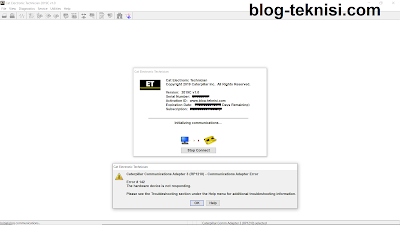 |
| Figure 1.9 - Error #142 |
→Click Help for open the Troubleshooting Guide.
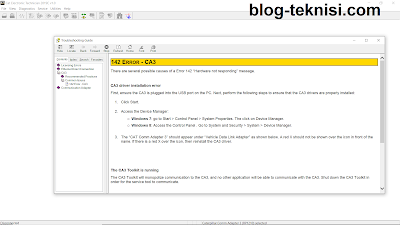 |
| Figure 2.1 - Troubleshooting Guide |
#Setting the Default Settings (Preferences)
The Default Settings feature allows the user to configure the service tool to
display a desired feature at startup. By default, the service tool displays the
ECM Summary screen at startup. Additionally, this feature allows the user to
configure whether histogram data will be displayed as raw data or as a
percentage.
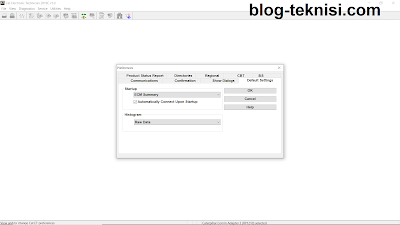 |
Figure 2.2 - Startup (Default Setting)
|
#To set the default Startup Tool:
1). Select the
Default Settings Tool tab from the
Preferences dialog box.
2). Select the desired feature from the Startup Tool drop down menu and
click
OK. The following can be set to display
at startup:
- ECM Summary
- Status
- Configuration
- Active Diagnostic Codes
- Logged Diagnostic Codes
- Active Event Codes
- Logged Event Codes
 |
| Figure 2.3 - Startup Display |
NOTE: If the selected feature is not supported by the ECM,
the ECM Summary feature will be displayed at startup.
Blog.Teknisi
Why rly 2 on our emcp4.2 is not energise during start up.This causes us problem of not having good start....any help will be appreciated.Our unit is cat.3412 with emcp 4.2 and peec.Thabk you
ReplyDeleteFrom your article, caterpillar engineer's can easily learn many new things.
ReplyDeleteGet the best Mold Inspection Services in San Diego at cheap rates.